

🆓 This member post is free for all, thanks to our paying subscribers. Enjoy!
Hey!
I take a lot of screenshots, for various reasons. Sometimes it’s to highlight something that needs to be fixed, or it’s an explanation as to how something works. Scribbling on a screenshot can bring clarity to things. I use it every day.
Let’s talk screenshots then!
How to take a screenshot
You grab a screenshot by pressing the power button (top right in portrait mode) and the volume up button (upper one on the right-hand side in portrait mode) at the same time. This will show a screenshot at the bottom of your screen that you can interact with. Tapping it opens the screenshot, which is where we’ll do all our scribbling, but you can also swipe it to the side to dismiss it, or just wait for it to go away by itself.

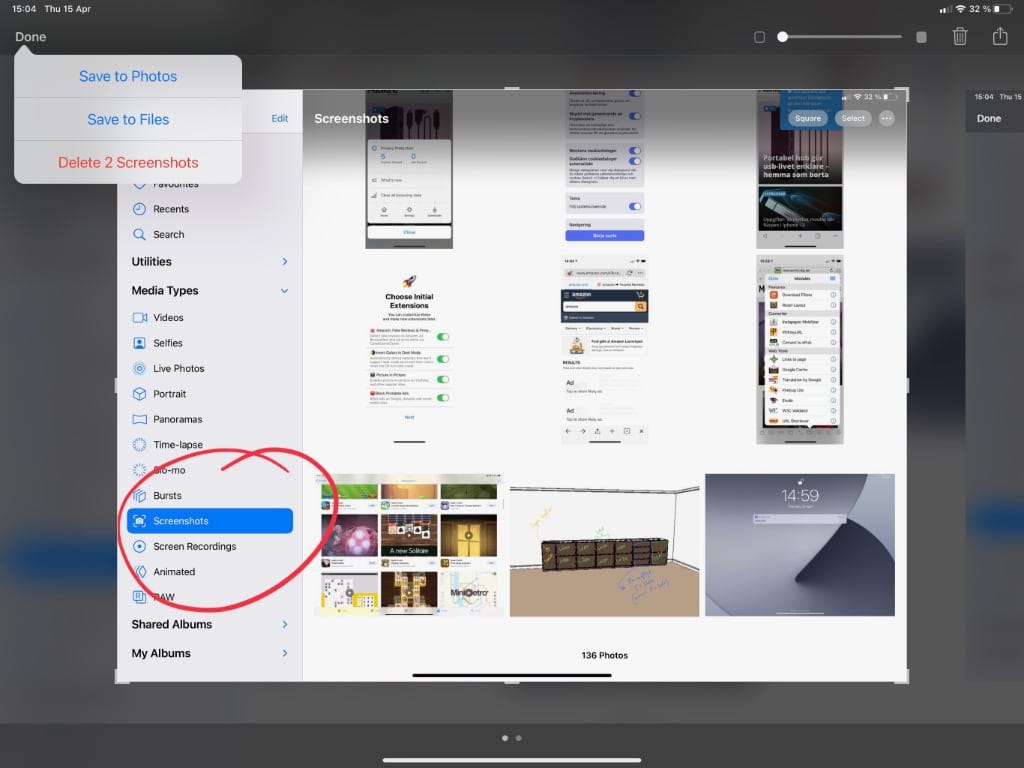
Screenshots are saved in your Photos library when dismissed. Finding your screenshots can be a bit tricky if you take a lot of photos, but luckily, you can find them all under Media Types, and then tapping Screenshots, within the Photos app.
Marking up a screenshot
Tap the screenshot thumbnail after taking a screenshot to enter markup mode. Here you’ll find the familiar marking up controls for pens and pencils, a ruler, and so on, just like the ones in Notes for example. Scribble away, with your finger or — preferably — using an Apple Pencil. Crop, zoom, all that editing loveliness is there. The basic shape features apply, and you can also select your written text. If you, for whatever reason, have taken several screenshots, you can flip through them horizontally.
When done, either share the screenshot using the share icon to the right, and/or tap Done in the top left. Tapping Done will give you the option to save your screenshot(s) to Photos, to Files, or delete them. When I take a screenshot of something, it’s usually to make some note on it and send it off, which means I probably don’t want to save it, but I sometimes do.
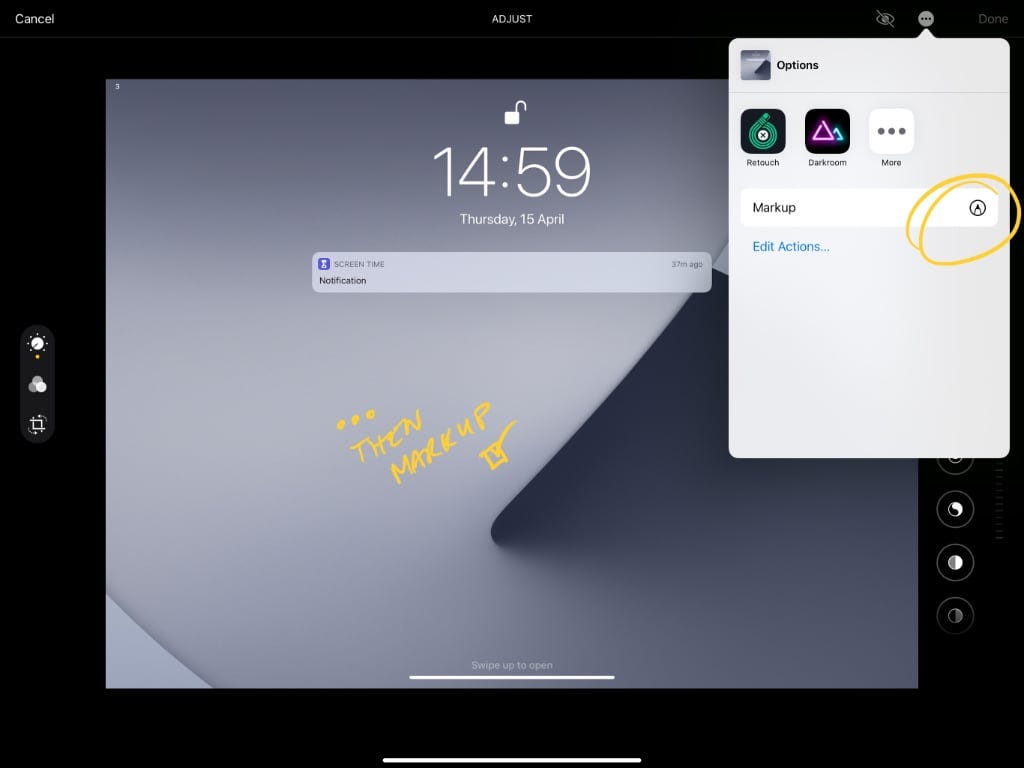
✍🏻 Markup after the factYou don’t have to tap the screenshot to do markups on it. Just find it in the Photos app, press Edit in the top right, and then the small three dots meny icon to show your editing options. Here you’ll find whatever apps you have installed that utilizes this feature, and also Markup.
Screenshotting websites in Safari
I often screenshot websites (my digital agency, Divide & Conquer, develops a lot of those), and while I’m usually just after a small portion of the site, I sometimes want the whole thing.
Screenshots to the rescue!
When taking a screenshot in Safari, you get the option to either get a normal screenshot, as in a shot of what’s on your actual screen, or the full page. In the markup view, toggle between the two modes — Screen and Full Page — using the tabs in the middle of the top bar.
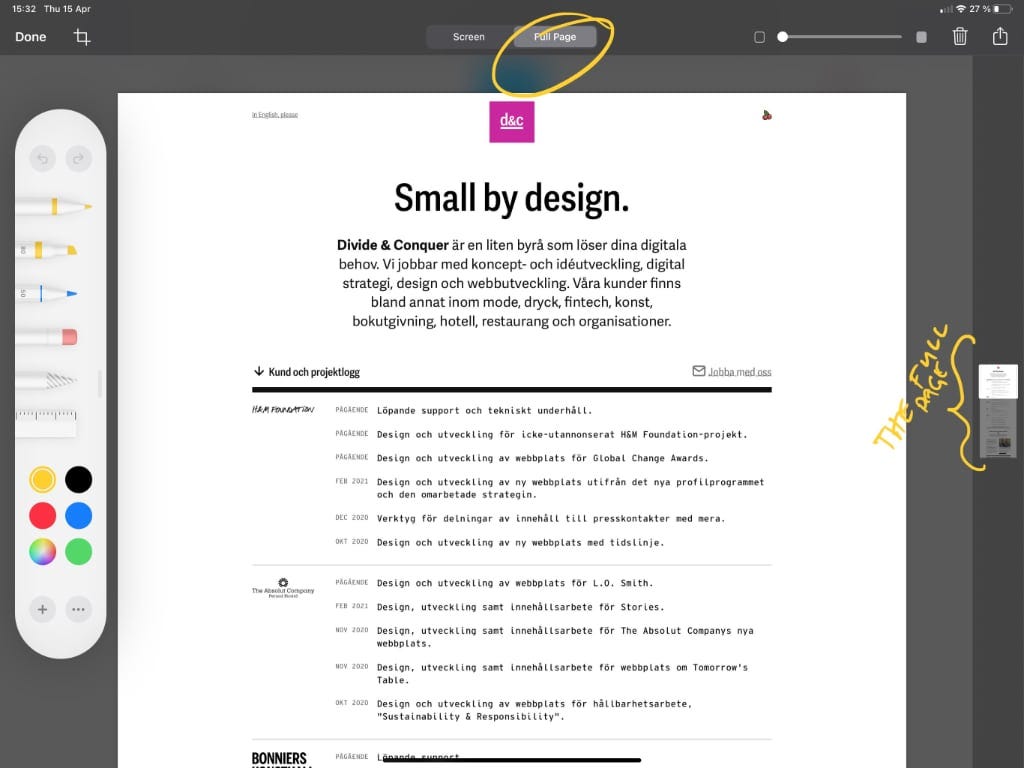
You’ll also find an overview of the full page on the right-hand side, where you can scroll up and down on your full-page screenshot. This means you can add markup all over the page, not just what’s on the actual screen when taking the screenshot, which is truly useful for someone like me.
Screenshots of full pages aren’t saved as images in your Photos library, they’re PDFs, so you’ll have to save those in Files if you want to keep them.
😑 Blank elements in my full-page screenshotSometimes there are blank spots in full-page screenshots. This is usually because there are elements on the website that hasn’t rendered yet, and thus they weren’t captured when you took your screenshot. Most of the time, scrolling down and then back up before taking a screenshot will solve this, but it’s not foolproof, and some effect won’t get captured at all.
That’s a lot of screenshots, yet again. It’s a powerful tool, one that our clients and partners appreciate a lot because it’s so easy to highlight things. Clarity over all.
I’ll see you next week. Until then, happy scribbling!
— Thord D. Hedengren ⚡️